
Ergonomic Tips to Make Your Home Workouts Safer and More Effective
Start with a clear, simple plan that keeps your body safe and your sessions productive. ergonomic tips for home workouts will help you cut pain, prevent injuries, and get more from each set without adding time or gear.
Set up your space so equipment sits at easy reach and your screen is eye-level. Small changes to posture and placement make form hold up as you tire and keep your neck and shoulders calm.
Move often: avoid holding one position longer than 20–30 minutes, and follow the 20-20-20 rule to protect your eyes during follow-along videos. Build warm-ups and mobility moves into every session to prep muscles and joints before you push harder.
Focus on cues that scale with fatigue—safe form, frequent short breaks, and simple recovery like hydration and cool-downs will protect your back, knees, and shoulders. These are easy habits you can apply in any room or environment so your work and training both support better health.
Key Takeaways
- Set equipment and screens to support good posture and reduce strain.
- Change positions every 20–30 minutes and follow 20-20-20 for eye relief.
- Include brief mobility and warm-up moves before intense effort.
- Plan short breaks to preserve form as fatigue builds.
- Use simple recovery steps—hydration, cool-downs, and joint care—to prevent injuries.
Set up a body-friendly workout space at home
Arrange one clear area that supports good position, sightlines, and quick adjustments. A tidy setup helps you stay focused and reduces the chance of injuries.
Screen and monitor height for follow‑along videos
Place your monitor or TV so your eyes meet the top edge at eye height. Keep the screen about an arm’s length away to protect your neck and your eyes.
If you use a laptop, raise it to eye level and add an external keyboard and mouse. That keeps shoulders relaxed and wrists neutral.
Flooring, mats, and foot support to reduce strain
Use a grippy mat on a firm floor so you stay stable during lunges and hinges. For standing circuits, add an anti‑fatigue mat or supportive shoes to ease joint load.
If your feet don’t reach the ground when seated, use a sturdy footrest so your hips and knees stay aligned.
Lighting, glare control, and clear sightlines
Set screens perpendicular to windows to cut glare. Replace flickering bulbs and add task lighting so you can see form clearly without hot spots.
Smart layout: clearance, storage, and quick adjustments
Clear at least your body length plus 2–3 feet around the zone. Keep bands and weights within arm’s reach but off the walking path.
- Do a 30‑second dry run to check sightlines and clearance.
- Keep a towel and water bottle nearby to avoid breaks that ruin momentum.
- Alternate sitting and standing gradually if you use a desk or chair in the same environment.
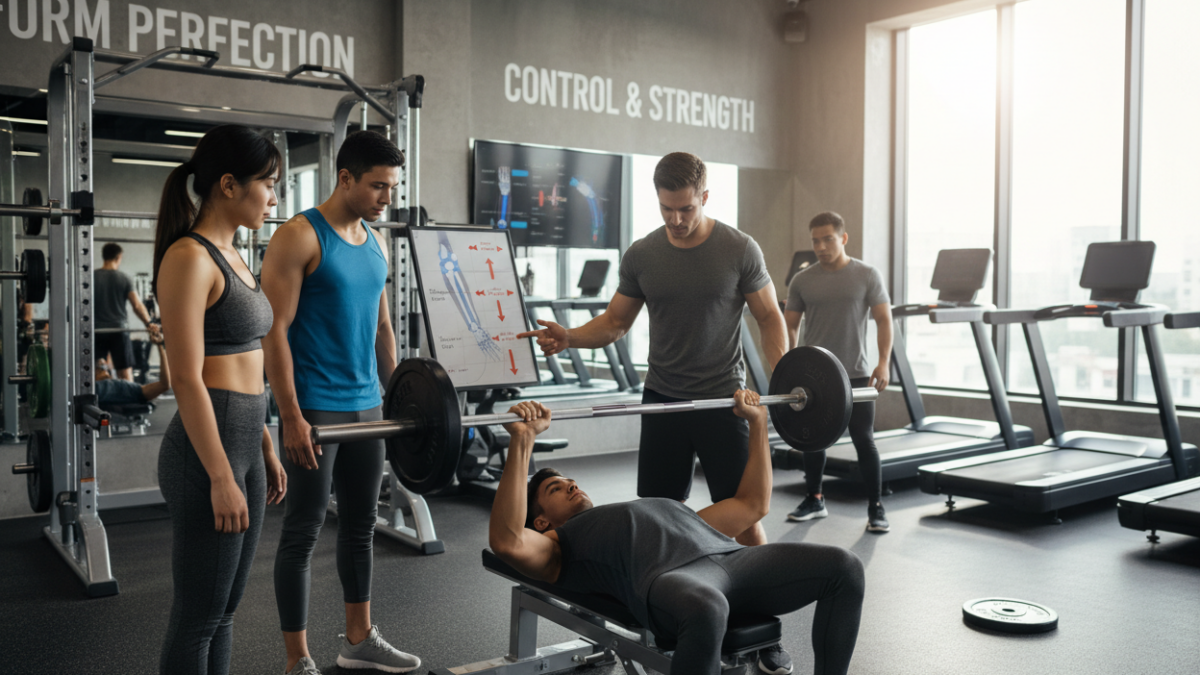
Posture cues that protect your neck, back, and joints during exercise
Small, clear posture cues make big differences in how your neck, back, and joints feel during exercise. Use these simple checks between sets and while you follow videos to keep pain low and performance high.
Neutral head and relaxed shoulders to curb neck and shoulder pain
- Keep your neck long with a gentle chin tuck; think a soft “double-chin” without tipping down. This counters forward head drift from screens or a raised keyboard.
- Let your shoulders hang down and slightly back. If they hike during a press or row, pause, exhale, and reset before the next rep.
Spine, hips, knees, and feet in line to safeguard your low back
- Stack ribs over pelvis and keep a neutral spine. Zip your front ribs gently toward your hips during overhead moves to avoid flaring.
- Track knees over second toes and keep feet planted. This shifts load through hips instead of collapsing into the back.
Wrists and grips: keep a neutral angle to avoid strain
- Hold handles without bending wrists. A straight line from knuckles to forearm reduces compression and keeps tendon strain low.
- If forearms burn, shake your hands, reset wrist angle, and shorten range slightly rather than letting form break. Good position beats sloppy reps and cuts long-term injuries.
| Cue | Why it matters | Quick reset | When to use |
|---|---|---|---|
| Chin tuck | Reduces forward head and neck tension | Hold 2 seconds, release | Before press sets or screen-led work |
| Shoulder drop | Prevents shoulder creep and tightness | Exhale and lower shoulders | During rows and presses |
| Neutral wrist | Limits carpal loading and overuse | Re-grip without flexion | Every time you lift a handle |
| Knee tracking | Protects spine by sharing load | Align knees over 2nd toe | Squats, lunges, and hinges |
ergonomic tips for home workouts you can use every day
Small position shifts every few minutes protect your body and sharpen focus. Treat posture as a series of small moves, not a single permanent setting. This keeps joints loose and reduces low‑grade fatigue.
“Your best posture is your next posture”: build in position changes
Don’t lock into one position. Change stance often so your muscles keep circulating fresh blood and your joints don’t stiffen.
Switch sitting angles, stand for short blocks, or half‑kneel in circuits. After two focused blocks, change from desk to floor mobility and return to the chair with a new angle.
Use timers: microbreaks every 20-30 minutes and movement snacks
Set a gentle timer and take microbreaks every minutes you choose—every 20–30 minutes suits most people. In tighter setups, consider brief check‑ins as often as every 10 minutes.
- Sprinkle quick movement snacks: 10 calf raises, 10 shoulder blade squeezes, or a lap down the hall.
- Pair habits when working home: sip water then stand; end a set then walk 30 steps.
- Keep warm‑ups short and frequent; they save time and improve focus and health.
| Timer | Action | Duration | When to use |
|---|---|---|---|
| 10 minutes | Microstand and chin tucks | 30–60 seconds | Less ideal desk or chair setup |
| 20–30 minutes | Reset stance and breathe | 1–2 minutes | Standard work block in home office |
| 60 minutes | Short mobility circuit | 2–3 minutes | After two focused blocks at your desk |
| End of day | Two‑minute reset: chin tucks, trunk twists | 2 minutes | If motivation dips late in the day |
Want to tune tempo and rest in your sets? See this rep tempo guide for simple timing that pairs well with short breaks.
Warm-up and mobility moves that make exercise safer
Spend a few focused minutes on mobility to cut stiffness and lower your risk of pain during exercise. These simple moves warm key muscles and restore range so you lift and move with better form.

Chin tucks and shoulder blade squeezes
Why: They reset head position and wake the upper back so your shoulders and neck stay calm around screens.
How: Slide your chin straight back, eyes level; hold 3–5 seconds. Do 10 reps, 2–3 times daily. Then pull shoulder blades down and together for 5 seconds, 10–15 reps. Stop if you feel sharp pain.
Hip flexor and hamstring work
Why: Tight hips and hamstrings pull on the low back and reduce flexibility during hinges and squats.
How: Standing hip flexor stretch: gentle lunge, torso tall, hold 20–30 seconds per side. Hamstring: supported hinge or seated single‑leg reach, 10–30 seconds each side. Breathe, and avoid bouncing.
Neck and trunk stretches
Why: Simple neck and spine moves ease stiffness from long sitting and improve mobility for pressing and rotation.
How: Seated spinal twist: 10–15 seconds per side with hips steady. Slow side bends for the neck: 10 seconds each way. Finish on the floor with a 1–2 minute breathing drill to settle your core before you start the main workout.
- Total warm-up time: Aim 5–8 minutes.
- Safety: Move gently, stop if sharp pain appears, and keep eyes at the top of your screen between sets to protect neck alignment.
| Move | Reps / Hold | Primary benefit | Safety note |
|---|---|---|---|
| Chin tuck | 10 reps, 3–5s | Neck alignment, reduces forward head | Keep eyes level; no forceful pulls |
| Shoulder blade squeeze | 10–15 reps, 5s | Activates upper back muscles | Avoid shrugging; relax breathing |
| Standing hip flexor stretch | 20–30s per side | Opens hips, eases low back tension | Keep pelvis neutral; ease into the lunge |
| Hamstring reach | 10–30s per side | Protects back during deadlifts and hinges | Support knee slightly if sore |
Form safeguards for common home exercises
Focus on how your body stacks and moves; that’s the fastest path to safer progress. Constant attention to alignment, tempo, and range keeps your sessions efficient and reduces the chance of injuries.
Push and pull: elbows, wrists, and shoulder alignment
Push-ups: stack wrists under shoulders, keep forearms vertical, and corkscrew palms slightly to set the shoulders. This sends power into the floor and protects your back.
Rows: lead with elbows close to the ribs, keep a straight wrist, and avoid shrugging. Let your mid‑back do the work so your neck stays calm.
Overhead press: finish with biceps near ears and ribs down. If your position flares, drop load, re‑brace, then press slowly along a smooth path.
Hinges, squats, and core: spine neutrality and foot placement
Hinges/deadlifts: push hips back, keep shins near vertical and a neutral spine. Stop before the low back rounds; quality prevents back injuries.
Squats: spread the floor with your feet, track knees over toes, and keep chest proud. Depth is earned by control, not momentum.
Planks/core: keep a straight line from ears to ankles, squeeze glutes, and breathe. Quality beats duration every time.
- Choose loads so the last 2–3 reps are challenging but do not break your posture; build strength with small, steady progressions.
- If certain conditions like knee pain flare, shorten the step, shift load to hips, or swap to supported split squats.
- Train barefoot or with flat, stable shoes for hinges and squats; use supportive footwear for standing circuits and increase standing time gradually over weeks.
- Rest purposefully: 45–90 seconds between sets, reset alignment, and visualize the next rep to keep form tight across the workout.
| Exercise | Check | Quick fix |
|---|---|---|
| Push-up | Wrists under shoulders; forearms vertical | Shorten range or use elevated hands |
| Row | Elbows close; wrist neutral | Reduce load; slow the pull |
| Deadlift | Hips back; spine neutral | Raise bar or use lighter weight |
| Squat | Feet spread; knees track toes | Box squat or reduce depth |
Recovery, eye care, and when to pause for pain
A clear cool-down and simple eye care habits keep small issues from growing into days of downtime. Treat recovery as a short, reliable routine you can do at the end of every session or long screen block.
Cool down and hydration
End sessions with 3–5 minutes of easy breathing, light stretches, and a slow walk to lower heart rate and soothe muscles.
Hydrate on a schedule: take small sips every 20 minutes during longer sessions so cramps and fatigue stay away.

Eye care and microbreaks
Protect your eyes with the 20‑20‑20 rule: every 20 minutes, look at something 20 feet away for 20 seconds. This cuts visual fatigue when you follow on‑screen cues.
If work stacks long screen blocks, insert quick movement breaks: climb a flight of stairs, walk the hall, or do 10 shoulder blade squeezes to reset posture.
Red flags and next steps
- If back pain lingers into the next day, scale load or volume and focus on hip and thoracic mobility.
- Watch for dangerous signals: numbness or tingling, sharp joint pain, night pain that wakes you, or swelling—these conditions need attention.
- Pause the provocative movement, modify range or tempo, and seek qualified care if symptoms persist.
| Quick anchor | When to use | Action |
|---|---|---|
| 3–5 minute cool down | After main effort | Breathing, light stretches, short walk |
| 20‑20‑20 | Every 20 minutes of screen time | Look 20 ft away for 20 seconds |
| Red flag check | Any persistent day‑after pain | Reduce load; seek professional support |
If you suspect your routine is causing broader strain or overuse, read the overtraining warning signs to learn when to pause and get extra help.
Conclusion
Final advice: Build a small, steady routine that makes your space and posture work together. Align your monitor at eye height and an arm’s length away, keep the screen perpendicular to windows, and use an external keyboard or raised laptop so your wrists stay neutral.
Change position about every 20–30 minutes, squeeze short stretches into breaks, and increase standing time gradually with supportive footwear or a mat. Follow the 20‑20‑20 rule to ease eye and neck strain.
Aim for roughly 150 minutes of activity each week and focus on strength and flexibility, not just sweat. If aches or injuries appear, scale back, refine your setup, and seek tailored advice. For related movement ideas, see these effective body‑weight bicep exercises.