How Controlled Abduction Trains the TFL Right

 0
0
 0
0 Keep direct tensor fasciae latae work small and purposeful. Effective TFL muscle workout tips and techniques use controlled hip abduction, flexion, and internal rotation, then balance that work with stronger glutes and stable single-leg training. Don’t treat every tight outer hip as a weak TFL. Train it directly only when weakness, poor control, or a qualified assessment gives you a reason.
Last updated: 2026-08-07
What are effective TFL muscle workout tips and techniques?
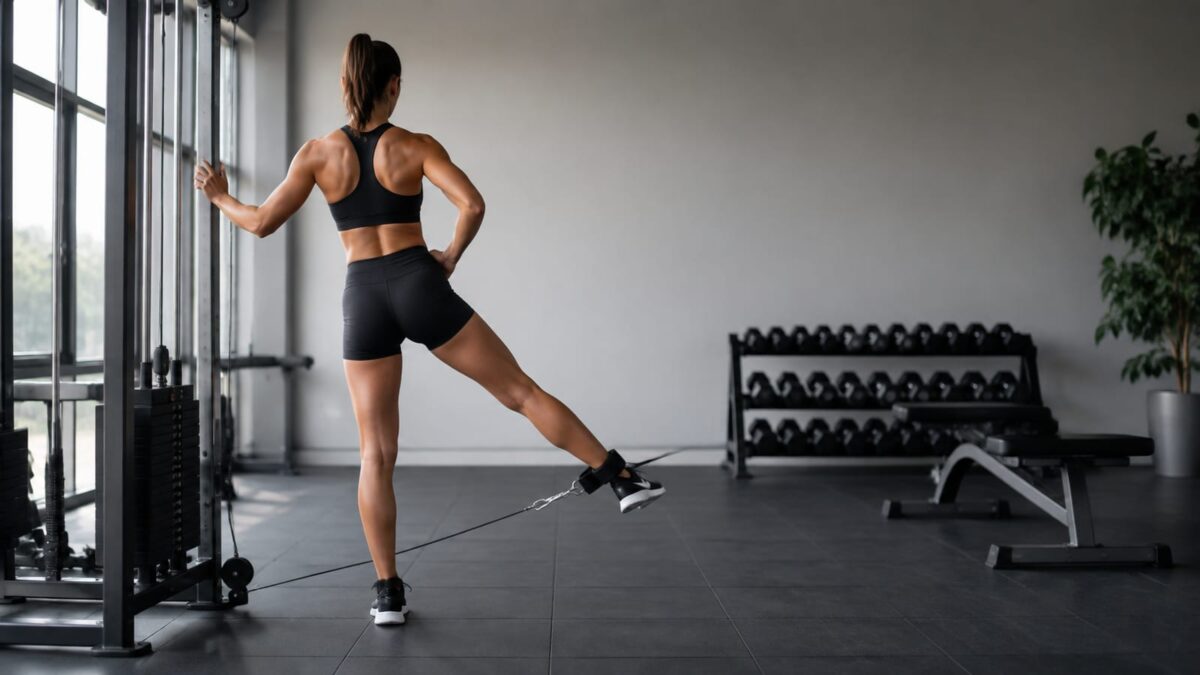
Use a standing band or cable hip abduction as your main direct exercise. Keep the working hip slightly flexed, point your toes forward or a little inward, and move without leaning. This position matches the tensor fasciae latae muscle’s main actions.
Then add a movement that trains the whole hip. Lateral step-downs, controlled single-leg squats, and hip thrusts make better foundations than endless tiny band drills. The TFL helps, but it does not need to run the entire session.
Follow these rules:
- Start with a small range you can control.
- Keep your pelvis level instead of hiking the working hip.
- Finish each set before clean technique breaks down.
- Add reps before using a stronger band or heavier cable.
- Train both sides, but let the weaker side set the standard.
- Stop if the movement causes sharp hip or outer-knee pain.
Your goal is repeatable technique and better hip control. A burning sensation near the front of your hip does not prove the exercise is fixing anything.
TFL anatomy and function
The tensor fasciae latae, usually shortened to TFL, is a small muscle at the front and outer part of the hip. It begins at the anterior superior iliac spine (ASIS) and the anterior aspect of the iliac crest.
The TFL blends into the fascia lata and iliotibial band. Through the iliotibial tract, force continues toward the lateral condyle of the tibia. That connection helps the muscle support the hip, thigh, and knee during movement.
The TFL contributes to:
- Hip abduction, which moves your leg away from your body
- Hip flexion, which brings your thigh forward
- Hip internal rotation, which turns your thigh inward
- Pelvic control while you stand or move on one leg
- Tension through the fascia and iliotibial band
The superior gluteal nerve supplies the TFL through the L4-S1 nerve roots. That same nerve also serves important glute muscles, which is another reason hip problems rarely belong to one muscle alone.
Who benefits from direct TFL work?
Direct TFL work makes sense if you struggle to control your pelvis during walking, running, step-downs, or single-leg exercises. It may also belong in a rehabilitation plan after a clinician identifies weakness.
However, most healthy lifters don’t need a separate TFL day. Squats, lunges, step-ups, single-leg work, and loaded carries already ask it to stabilize the hip. More isolation work can become one more task that doesn’t change your training.
Direct work may help:
- Lifters rebuilding hip strength after inactivity
- Athletes who lose pelvic control on one leg
- People following a physical therapist’s plan
- Lifters with a clear side-to-side control difference
- Runners returning gradually after a resolved lateral hip issue
Skip extra TFL work if the area already feels overworked during every leg exercise. In that case, improve glute strength, exercise setup, and training load first. This guide to addressing muscle imbalances can help you judge the wider pattern.
Exercise comparison
No single exercise isolates the TFL perfectly. It shares hip abduction with the gluteus medius and gluteus minimus, while several other muscles help control the pelvis.
Choose the exercise by the job you need it to do. Direct drills build specific control, while step-downs and bridges train the hip as part of a larger movement.
| Exercise | Main use | Key setup | Change it if |
|---|---|---|---|
| Standing band or cable hip abduction | Direct TFL strengthening | Slight hip flexion, toes forward or slightly inward | You lean or hike the hip |
| Side-lying hip abduction | TFL and gluteus medius training | Pelvis stacked, knee straight, controlled range | Your pelvis rolls backward |
| Banded march | Hip flexion with pelvic control | Stand tall and lift without twisting | Your lower back arches |
| Lateral step-down | Single-leg hip and knee control | Lower slowly and keep the pelvis level | The knee collapses inward |
| Hip thrust or bridge | Glute strength with less direct TFL demand | Finish with the glutes, not the lower back | Hamstrings cramp or the back takes over |
| Side plank with leg lift | Hip and trunk stability | Keep a straight body line | The top hip rolls backward |
Side-lying hip abduction shows why exercise labels can mislead. Peak TFL activity has been reported at 54.3% ± 19.1% of maximum voluntary isometric contraction (MVIC). Gluteus medius activity reached 79.1% ± 29.9% of MVIC, while gluteus maximus activity reached 25.3% ± 24.6% of MVIC.
Those numbers show shared work, not a winner. Electrical muscle activity does not tell you which exercise will build the most muscle, fix pain, or suit your hip.
For direct TFL work, keep the standing abduction and banded march. For better overall hip function, make step-downs, hip thrusts, and stable single-leg work the foundation.
Technique for the main movements
Direct abduction drills
For standing band or cable hip abduction, attach the resistance low and stand beside the anchor. Hold a stable support so balance does not limit the target muscle.
Let the working hip bend slightly. Move the leg out and a little forward while keeping the toes mostly forward. Pause briefly, return under control, and keep your trunk still.
If you have to lean away from the cable, the load is too heavy. Reduce it until the hip does the work without the rest of your body negotiating the rep.
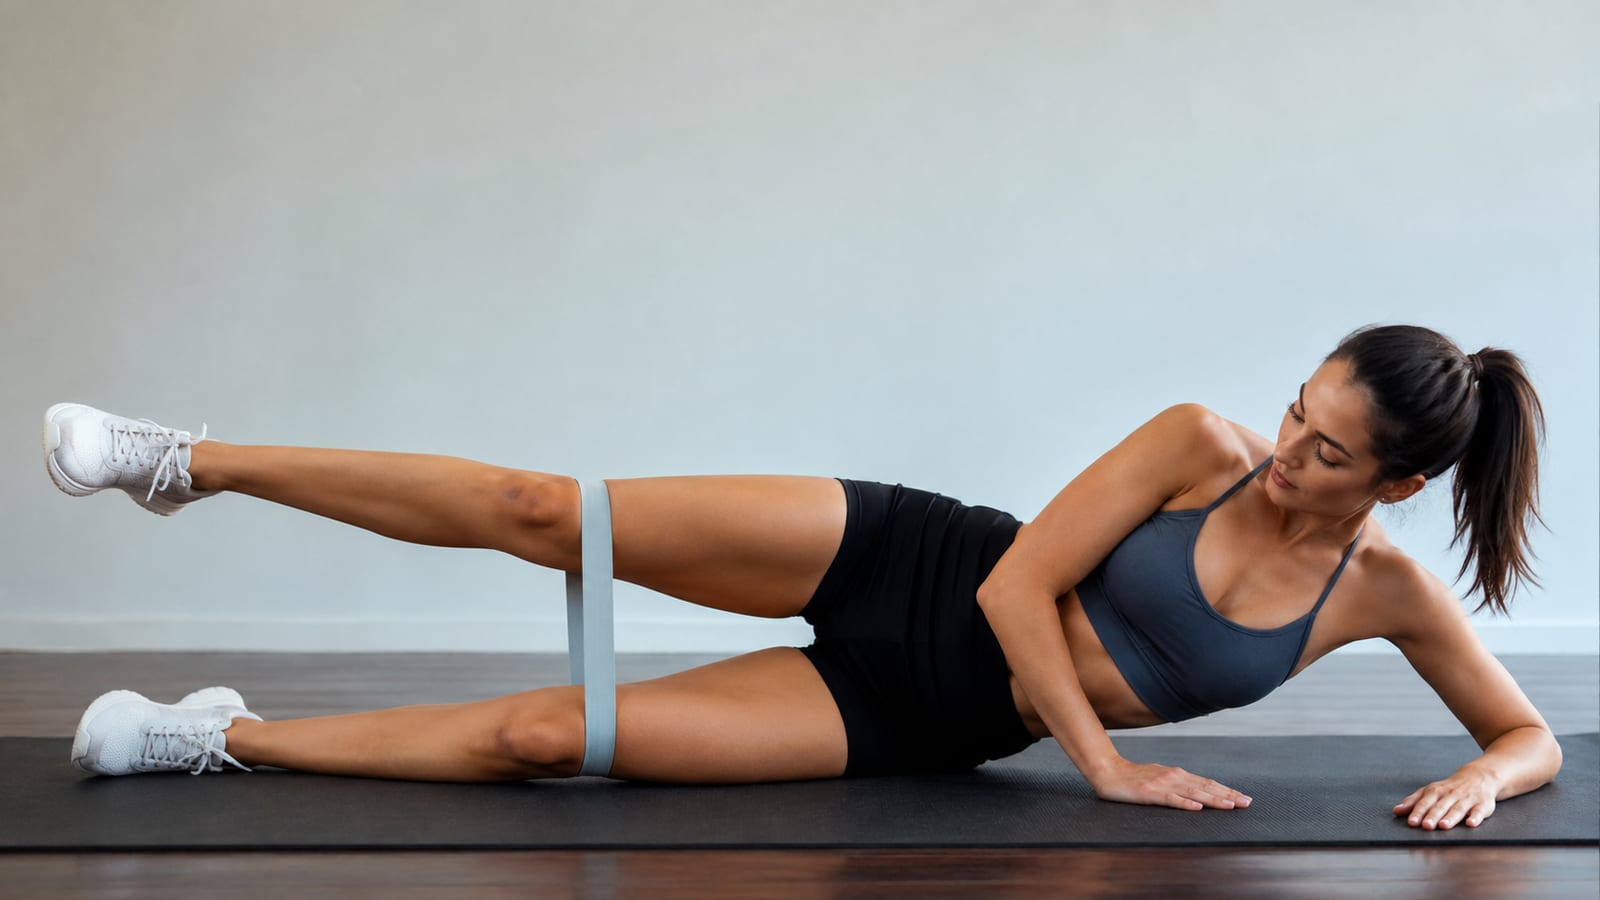
For side-lying hip abduction, lie on your side with your bottom knee bent for support. Keep the top leg straight and stack your hips.
Raise the leg without rolling your pelvis backward. Lower it slowly instead of dropping it onto the bottom leg. A small clean range beats a large swing.
Marches and step-downs
For a banded march, place a loop around your feet or use a low cable attached to one ankle. Stand tall and bring one knee forward without shifting your weight sideways.
Keep your ribs over your pelvis. If your lower back arches as the knee rises, shorten the range or reduce the resistance.
This drill works well before running or lower-body training. However, it should make you feel more controlled, not tired enough to change your main lifts.
For a lateral step-down, stand on a stable step with one foot near the edge. Slowly lower the free heel toward the floor while keeping the working foot planted.
Keep your pelvis level and your knee tracking with your foot. Then return by pushing through the whole foot.
This is not a TFL isolation exercise. It trains the TFL, glutes, quadriceps, and foot together, which is closer to what they must do during running and daily movement.
Keeping the glutes involved
Build hip extension and external rotation strength alongside abduction. Hip thrusts, bridges, controlled split squats, and stable single-leg hinges give the glutes work the TFL cannot replace.
During side-lying abduction, don’t drag the leg far forward. That adds hip flexion and can shift more work toward the TFL. Keep the leg roughly in line with your body if glute training is the goal.
Watch for these common mistakes:
- Letting every glute drill become a front-of-hip burn
- Using a band so heavy that your pelvis twists
- Treating fatigue as proof of useful tension
- Adding more isolation instead of fixing poor technique
- Stretching harder before checking training load
- Ignoring weak hip extension because abduction drills feel easier
If you want stronger glutes, train the movements they perform well. Don’t ask side leg raises to solve your whole lower body.
Progressing a TFL workout
Start with resistance that lets you hold the same pelvic position from the first rep to the last. Stop when you can no longer move without leaning, twisting, or hiking the hip.
Progress in this order:
- Make the movement smooth and repeatable.
- Add clean reps within your chosen range.
- Add a small amount of resistance.
- Rebuild your reps with the heavier load.
- Move to a harder position only when control stays intact.
Track the exercise, resistance, reps, and any pain response in your logbook. Keep the plan if control improves and symptoms stay calm.
However, don’t add more work just because the muscle no longer gets sore. Soreness is a poor progression target. Better reps, stronger resistance, and cleaner single-leg control tell you more.
Managing tightness and outer-knee pain
When the TFL feels tight
Reduce the movement that keeps irritating it, then restore comfortable motion and train the surrounding muscles. Stretching alone often provides short relief without changing why the area keeps tightening.
A simple half-kneeling position can help. Place the affected side behind you, gently tuck your pelvis, and squeeze that glute. Shift your pelvis slightly away from the rear leg without arching your lower back.
You can also use a ball or foam roller around the muscular area below the front of the hip. Keep the pressure tolerable and avoid grinding directly over painful bone or the outside of the knee. This guide to the benefits and limits of foam rolling explains where it fits.
Self-massage can change how the area feels for a while. It does not replace load management, strength work, or medical assessment.
Running and outer-knee pain
Cut back the running load that provokes symptoms and keep pain-free strength work in place. Don’t respond by hammering the TFL with more band exercises.
Outer-knee pain may involve iliotibial band syndrome, often shortened to ITBS. Reported prevalence among runners ranges from 5% to 14%, but not every sore outer knee is ITBS.
Running-related symptoms can involve training load, hip control, stride changes, terrain, and recovery. Therefore, the plan should usually include:
- Reduce the running that clearly aggravates symptoms.
- Restore it gradually after symptoms settle.
- Train hip extension and abduction strength.
- Include calf and foot strength work.
- Use stable step-downs or single-leg squats.
- Review recent changes in pace, hills, or volume.
Foam rolling the outer thigh harder is not a complete plan. If pain returns at the same point in every run, get the cause assessed rather than repeatedly numbing the area.
Direct training trade-offs
Direct exercises are simple to learn and easy to load with bands or cables. They can also expose poor pelvic control that larger lifts hide.
However, the TFL is small and already active in many lower-body movements. Too much direct work may add fatigue without improving your squat, running, or daily movement.
| Approach | Keep it when | Skip or change it when |
|---|---|---|
| Direct TFL isolation | A clear weakness or control problem exists | The front of the hip already dominates |
| Glute-focused strength | You need broader hip strength | Pain prevents stable loading |
| Mobility work | Motion feels restricted but improves afterward | Stretching makes symptoms sharper |
| Self-massage | It gives short-term comfort before movement | You rely on it instead of changing load |
| Single-leg training | You can keep the pelvis and knee controlled | Balance hides the muscle work |
| Running through discomfort | Almost never | Symptoms worsen during or after the run |
For muscle growth, direct TFL training has limited visual payoff compared with glute, quadriceps, and hamstring work. For rehabilitation or movement control, it can be useful in the right dose.
Signs the workout is working
Look for better control, more resistance, and less compensation. You should be able to perform step-downs, marches, and abduction work without leaning or twisting.
Daily movement should also feel steadier. However, the absence of a burning sensation does not mean the TFL failed to work.
Change the plan if:
- Pain rises during each session.
- Outer-knee symptoms spread or become sharper.
- Your hip feels less stable after training.
- Your lower back takes over every drill.
- Progress stalls while fatigue keeps rising.
Effective TFL muscle workout tips and techniques should improve what you can do. If the plan only makes one small area sore, make every set serve a better purpose.
FAQ
Should you train the TFL before or after a leg workout?
Use light control drills before your main lifts only if they improve the next movement. Put harder cable or band work after squats, hinges, and presses. A tired hip stabilizer should not decide how well your main exercises go.
Can cycling strengthen the TFL?
Cycling trains repeated hip flexion, so the TFL does contribute. However, cycling is not complete hip strength work. Add controlled abduction, hip extension, and single-leg exercises if the bike is your main activity.
Can you build a visibly larger TFL muscle?
The TFL can grow from resistance training, but its small size limits the visual return. If physique development matters most, put your productive sets into the glutes, quadriceps, and hamstrings first.
Do you need resistance bands for TFL exercises?
No. Side-lying leg raises, step-downs, marches, and single-leg balance drills all work with body weight. Add resistance only after the unweighted version stops challenging your control.
When should TFL pain be assessed by a professional?
Get assessed after a fall or sudden injury, or if pain changes how you walk. Numbness, marked weakness, pain at rest, and symptoms that keep returning also deserve more than another round of stretching.
Related on this blog